Learn How To Use Elementor Popups
Let’s dive deep into the world of Elementor popups and unveil the secrets to harnessing their full potential! In this article, we…
Read article Skip to main content
Are you thinking about how to move your event business online during Covid-19 and earn money? Then this guide is for you. If you want to start an event company and need a great website, thinking of rebuilding a more reliable and robust event-based website or creating an event company? Let’s not waste more time. Let’s get started.
Your website is undoubtedly one of the aspects of your business that needs the most attention. The event listing website is providing visitors with a list of future events. It is the most powerful way to promote your events and attract potential customers. While an online presence is essential, you may find it challenging to reach a theme that suits your requirements.
It’s not difficult to find a suitable theme for your event-based website if you know what to look for. If you want to create an event listing website with WordPress, we have one of the best themes for you, “Eventify.” This theme provides powerful features and extraordinary functionality for your events.
Making money via an event website seems like a fabulous idea. Here’s an extensive list of how you can make money through your event website.
It is a perfect way. You can allow your host to sell tickets within your website. It helps you in increasing your audience and raising funds for your nonprofit events. It’s one of the most effective ways to make money from your event website.
Offering paid sponsorships is one of the most effective ways to make your event profitable. It is a great way not only to create extra revenue for your event. You can also get discounts from your sponsors to give out as gifts to your attendees.
You can organize the events and set your prices and take charge per event handling. Because it’s your site, you have complete control over listing costs, campaign fees, and advertising.
The first step is deciding which platform to select for your website. WordPress is the right platform for creating your event-based website. The platform gives you a lot of freedom and flexibility to customize, monetize, and have complete control over your site. It will save you from the hassles of coding, programming, or designing and help you manage your content and the website’s outlook in a super-easy way.
When you create your event-based website, you need to get a domain name and a hosting web service. A domain name is easy to define your business and allows visitors to access your website. When you select a domain name for your website, always try to keep in mind the following points.
i. Domain Name must be Short and Simple
Short domain names are simple to remember, type and spell. Plus, your domain name should be the same as your brand name or as close to it as possible.
ii. Don’t Use Numbers and Hyphens
Don’t use numbers and hyphens in your domain name because it will complicate the word and not easily remember.
You’ll need to choose the trusted hosting provider to run your event-based website. You can check; the hosting servers offer you high performance and a robust support system and offer the best plans.
It’s true to say that your event-based website’s final success or failure depends on your theme. So, always select a great-looking, robust, functional, and great theme for your website. Many themes provide excellent features and powerful functions that potential customers seek while searching for a theme for your event website.
One of the best themes that I would like to suggest to you is our Eventify WordPress theme. All of the functionalities are already built-in with the event-based theme. So, don’t worry about adding any extra plugins. It offers all the explored features to your visitors.
Plus, this theme enables you to offer many customizations options to personalize your website as per your requirement. It is perfect for party events, event listings, world events, etc.
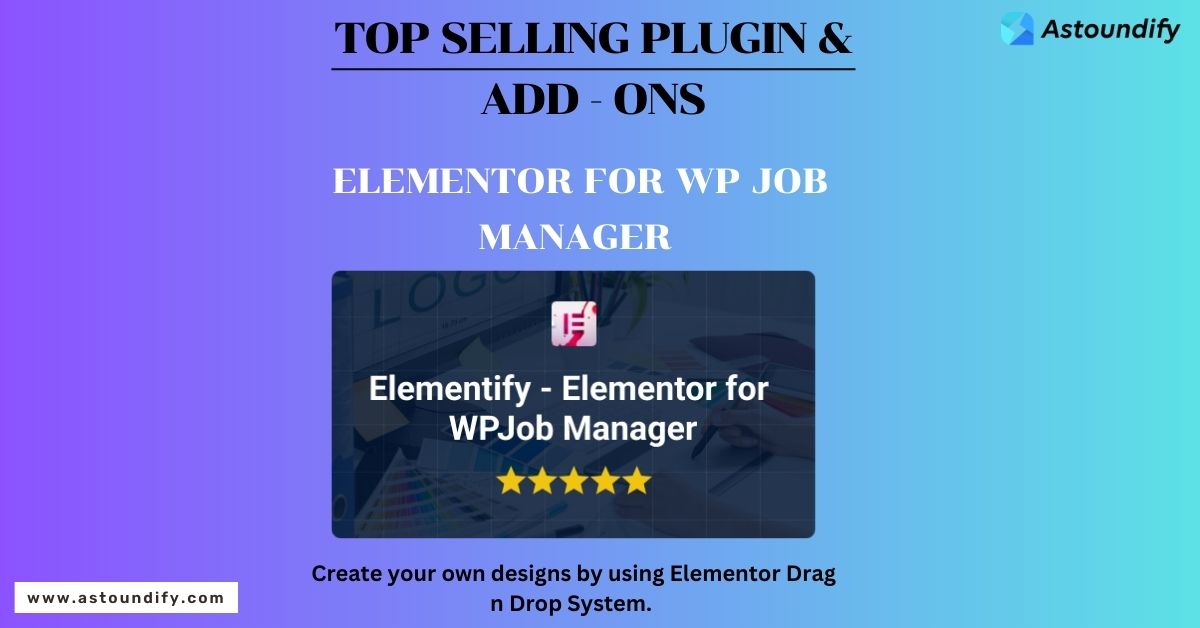
Elementor is one of the best drag-and-drop page builders. Eventify Theme smoothly works on Elementor. With a Theme, you can build your event website in less time and without needing to touch a single line of code.
To get started, first of all, you will need to login into your WordPress Admin dashboard. Go to Appearance >> Add New. Now, click on the Upload Theme, upload the ”Eventify” theme zip file. This theme creates an event-based website.
Please see the below screenshot for more detail.
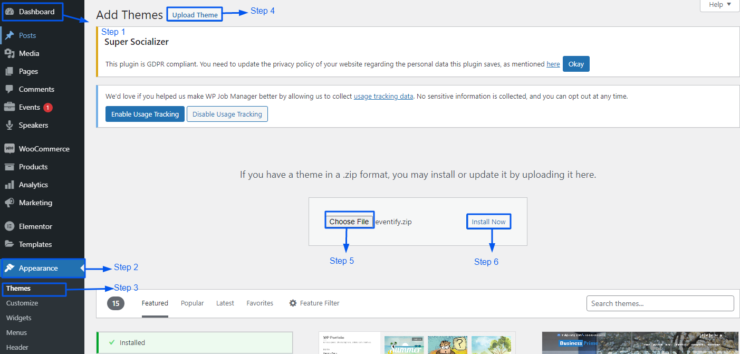
Click on the ”Activate Theme” button. Your Eventify theme is now ready for use.
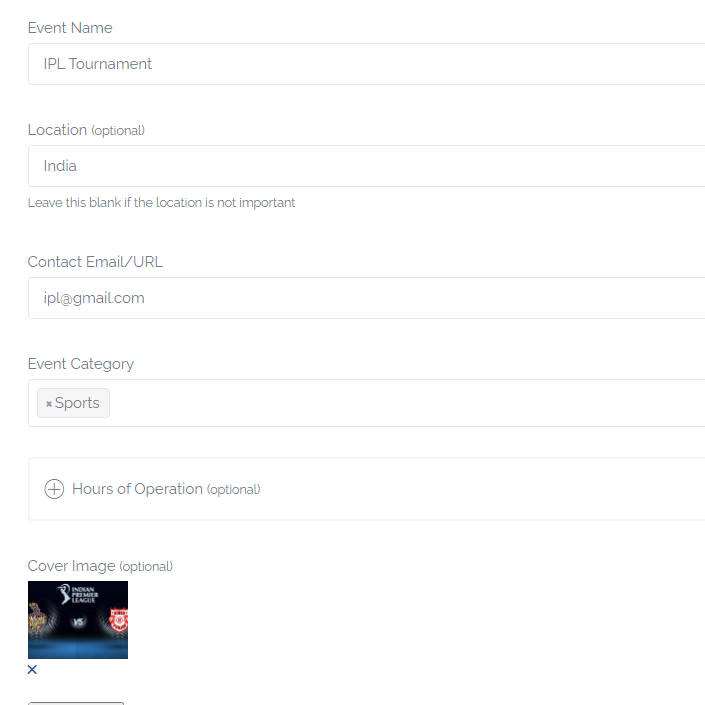
First, go to the front side and click on the Create Event button.

There are various fields available. This field allows you to specify all-important event listing details.
Start by filling out your event information. Let’s quickly summarize the guide for all the essential fields.
Once you have completed the event form, you can preview a submit form on the site.
Once you have completed the event form, you can preview an event what it will look like on the site.
After clicking on the Submit Listing button, look at the screenshot below to show a message like this.

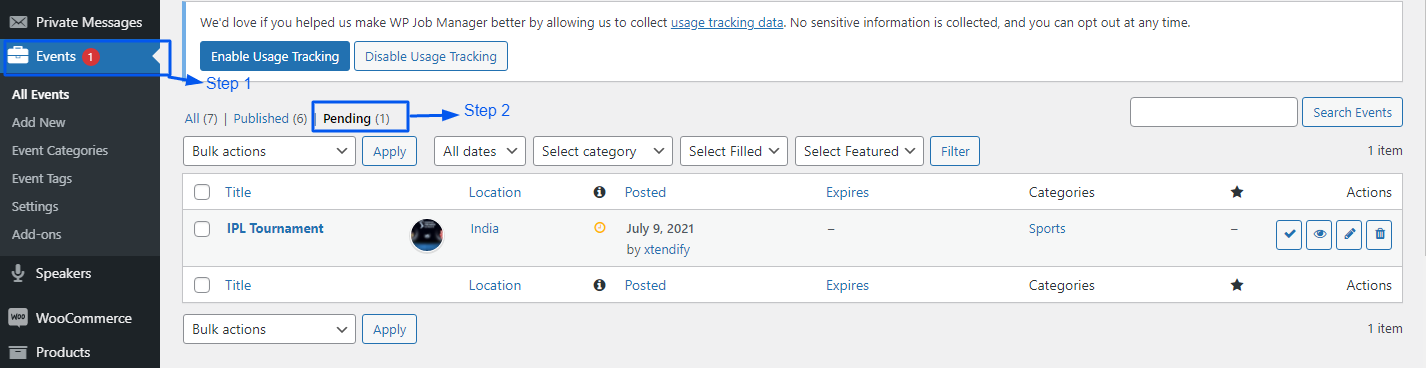
If you are an event website admin, go to your WordPress admin dashboard >> Events. Click on it. Here, you can show all the pending event listings. Click on the Approve button and live your event listing.
Also, If someone other than the site admin creates an event, then it would need approval, and those events would show in the pending list. Once approved, the event will be visible on the front end.
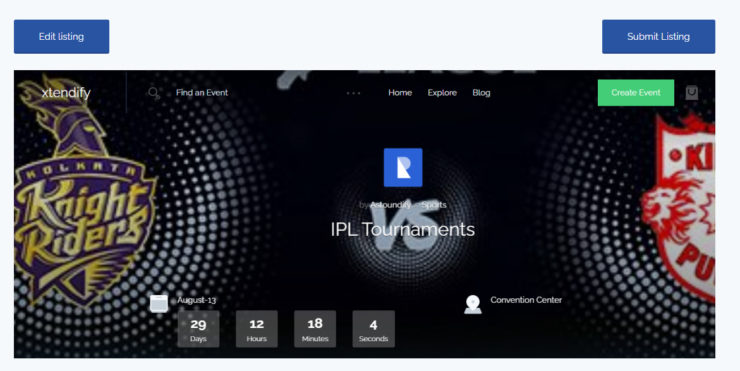
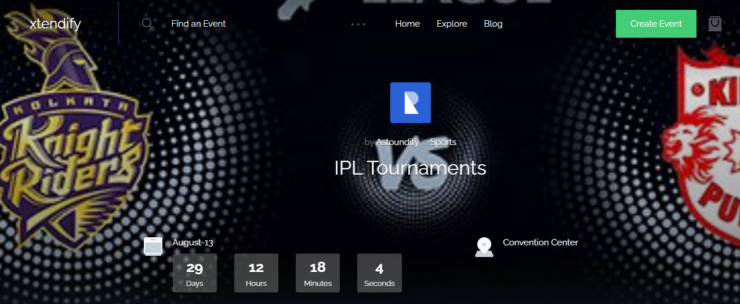
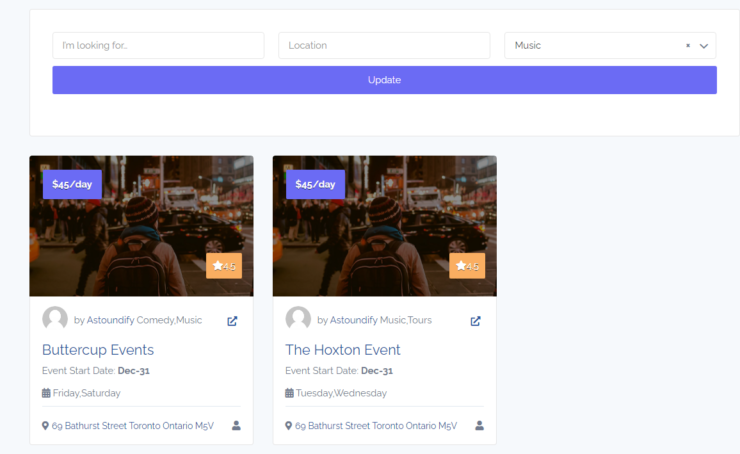
After approved the event; you can preview this event by visiting the front-end of your site:
Here, you can directly show the entire event listing in your dashboard. You can see various options. Like; Edit, Duplicate, Delete.
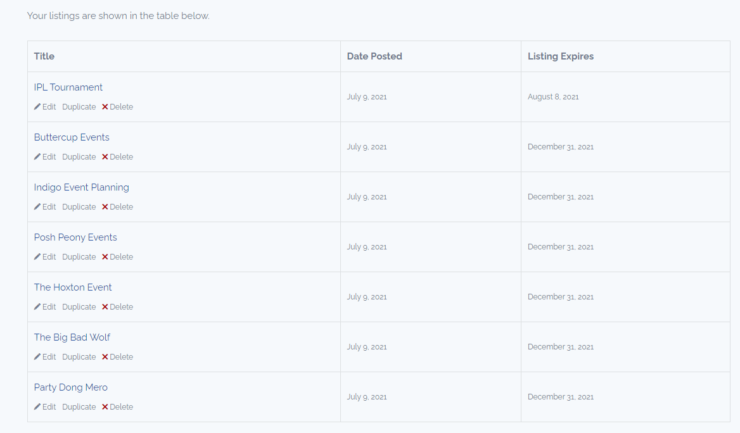
It’s a simple view of an event dashboard with all the possible options.
Here, you can search an event keyword-wise, location-wise, and category-wise.
Step 1: On the back-end side, you can see a Speaker’s menu. Click on it.
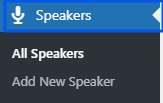
Step 2: Now, you can see the Add New Speaker button at the top of the page. Click on that button.
![]()
Step 3: Write a speaker name, add a description about the speaker, add a speaker’s social account details, and add a speaker image. After that, publish the page.
Whenever users can add a new event, see all the speakers in a drop-down list and choose from there.
Step 1: On the back-end side, you can see a Products menu. Click on it.
Step 2: Now, you can see the Add New, Import, and Export button at the top of the page. Click on the button as per your requirements.
Step 3: Write a ticket name, add a description about the ticket, add a ticket’s price detail, add a ticket gallery image and add a ticket image. After that, publish the page.
If you want to enhance the sell tickets functionality on your event website, you need to install WooCommerce Bookings and our Products plugin.
Below are a few easy things to keep in mind when building your event-based website.
The main aim of your event website is to provide useful event data to the users. When you plan an event, first, make the website live with minimal information, so people can “Save the Date” of an Event.
Always create a mobile-friendly website because most of the users are surfing mobile devices. Mobile-friendly websites are preferred by Google and will ensure your event gets maximum visibility.
A countdown widget shows the remaining days and times for events. So, people can be excited about the event.
Give sponsors some extra love with an entire page devoted to all of them. Thank those who are supporting your event. When new sponsor signs on, get them to send you a logo with the right specs
You can provide a feature like; Speakers, Schedules, etc. These features provide what you would use to draw people’s interest in an event. People are busy; give them a reason to come to your event, whether it’s selling them on what they’ll learn or how much fun they’ll have.
That’s the end! As you can see, by using the Eventify Theme, you can easily design a beautiful event website by yourself. We hope after considering this step, you can quickly build your event website in minutes. If you have any doubts, feel free to contact our support team. Have you created an event-based website using WordPress? You can share your thoughts in the comments section below.
Let’s dive deep into the world of Elementor popups and unveil the secrets to harnessing their full potential! In this article, we…
Read articleAre you tired of manually posting job listings on your website and sifting through countless resumes? Look no further than the WP…
Read articleElementor is a powerful page builder plugin for WordPress that makes it easy to create custom popups for your website. In this…
Read article Optimized by Seraphinite Accelerator