Learn How To Use Elementor Popups
Let’s dive deep into the world of Elementor popups and unveil the secrets to harnessing their full potential! In this article, we…
Read article Skip to main content
We all know that getting started is always the most challenging part. In the Covid-19 pandemic, everything has had to be moved online by the organizers of the event. From conferences to social gatherings to educational classes, everything is now available online for virtual presence. Hence, virtual events are becoming an essential part of our new way of life. It is much more efficient, sustainable, and successful.
Their reach is virtually unparalleled, and anyone from anywhere in the country can organize them. One of the main reasons for its success is the idea because it has no limits. Microsoft, Google, and Zoom have released online meeting tools to help users conduct meetings over the web. It’s okay if you’re confused; we’ll explain everything about build a WordPress virtual events website in this guide, and you’ll find it pretty easy.
Sounds cool? Keep reading!
A virtual event is a digital place where people connect online via desktops or mobile devices rather than physically gathering in one place. It can range from small gatherings and group gatherings to large-scale organizations with thousands of attendees.
There are several kinds of Virtual Events, such as:
One of the main reasons we all love WordPress is that it can be quickly customized to suit your needs. There are several difficulties while it comes to hosting events online. Virtual events are organized and managed by the use of a variety of applications. WordPress virtual events are one of the best solutions. You can host your virtual events in just a few steps.
If you use WordPress’s Eventify theme, you won’t even need to use any other apps. You can quickly build your event website to attract visitors and boost your reach. Zoom meetings and new related choices are good, but the WordPress Eventify theme is much better for hosting your virtual events.
Let’s quickly summarize the some best ways that can help to make revenue for your virtual events.
You can make money via sponsorship. In your virtual event, make some space for your sponsor and earn money. You can mention their brand on the registration page, event website, virtual conference link, email marketing, etc.
Selling premium tickets is one of the most common ways, and one of the easiest ways to set up is direct ticket sales. Create value by offering exclusive content and providing links to your virtual conference, created by a ticket’s successful buying.
Giving paid memberships is one of the best ways to monetize your regular events if you conduct them regularly. Like; If a user purchases monthly membership plans, it can access X amount of virtual events per month. For each virtual event you host, you won’t have to worry about selling single tickets. It is a great way to make the monetization procedure go further quickly.
Here, we will explain a step-by-step guide to building virtual events with WordPress in just a few clicks, using a simple and easy-to-use theme. So let’s jump in.
Choosing a domain is an essential step to growing your company’s brand. Your domain name is generally among the first things people view, and that may affect how they view your website and business. A well-chosen domain name can attract user attention and engage customers.
A web host is needed for any website as they provide the servers that store and manage the website. Your hosting decides how quickly your site works, how fast you manage downtimes, and how your brand presents to the digital world. And if you don’t choose the right hosting plan, you hurt your brand’s reputation.
Login to your hosting account and install a WordPress via cPanel. WordPress is a powerful open-source content management system. And, it provides the flexibility to choose a theme, plugins, templates to add unique features and great functionality to your virtual events website.
Install the Elementor plugin from your WordPress directory to create a virtual event website without writing a single line of code. Elementor is a powerful drag and drop editor.
There are many themes available for your virtual events website. Building a virtual events website was not easy, but the “Eventify” theme brings unique features to create a virtual events website. This theme is also compatible with Elementor.
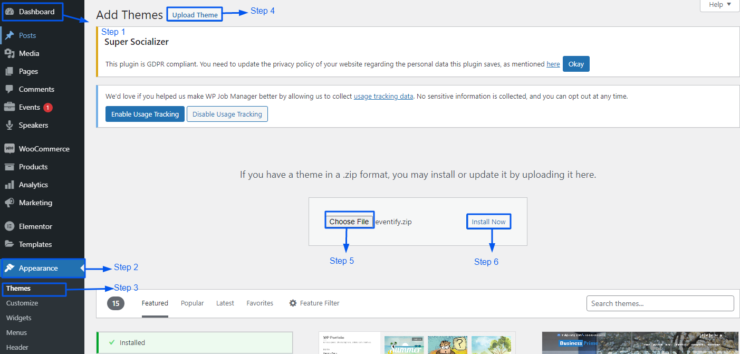
How to Install a Theme?
The first step is to log into your WordPress admin dashboard. Next, go to the Appearance » Themes and click on the Add New. Now, click on the Upload Theme, upload the ”Eventify” theme zip file. This theme creates a virtual events website.
For more information, please see the screenshot below.
Once your theme installs, click on the “Activate Theme” button. Now, you have successfully installed and activated your WordPress “Eventify” theme, and it is ready for use.
Now, it’s time to create a new virtual event. Go to your virtual event website’s front side.
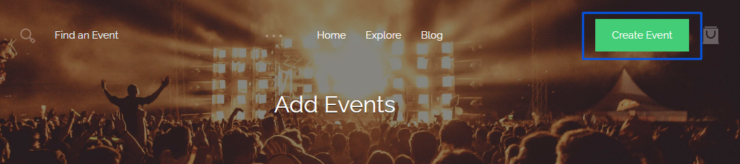
After that, click on the Create Event button.
Here, you can see many fields. So fill in all of the information you need, like the event name, location, event category, and much more.
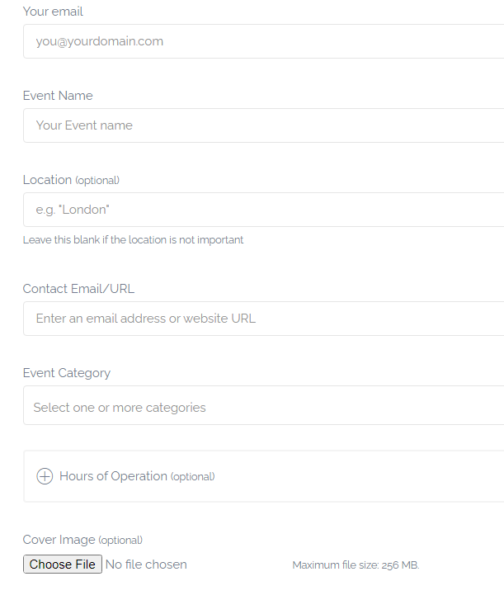
Let us quickly summarize all the required fields and add a virtual event.
Once you have completed the virtual event form, you can preview a submit form on the site.
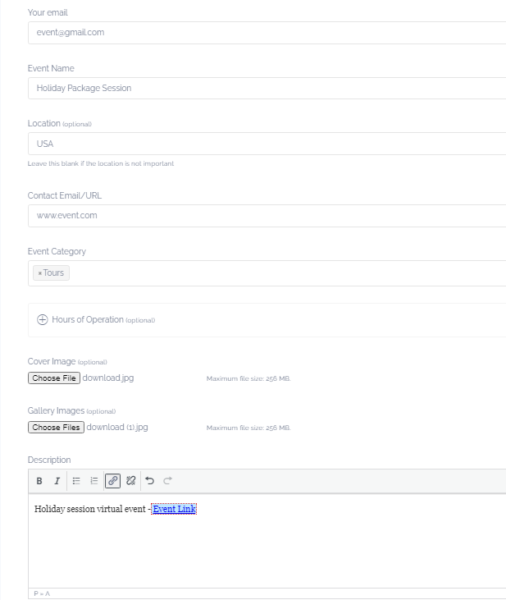
Once you have completed the virtual event form, you can preview a virtual event what it will look like on the website.
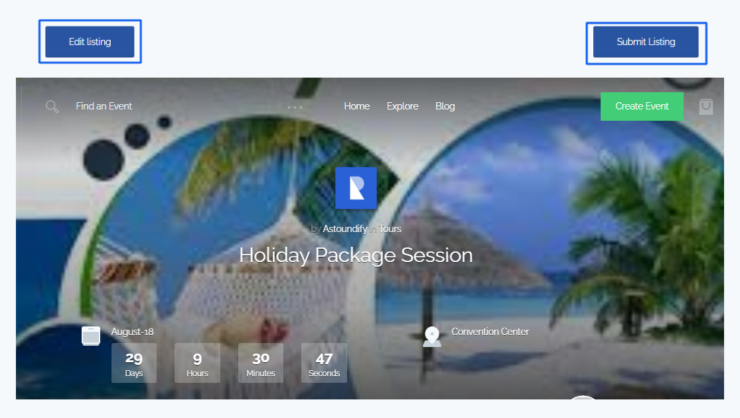
After clicking on the Submit Listing button, look at the screenshot below to show a message like this.

If you are a virtual event website admin, go to your WordPress admin dashboard >> Events. Click on it. Here, you can show all the pending virtual event listings. Click on the Approve button and live your virtual event listing.
Also, If someone other than the site admin creates an event, then it would need approval, and those virtual events would show in the pending list. Once approved, the virtual event will be visible on the front end.

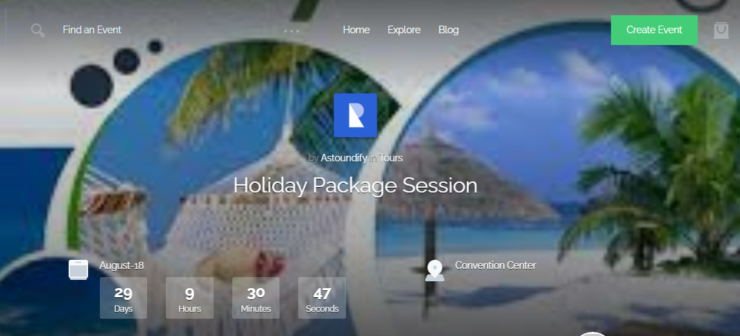
After approved the virtual event; you can preview this virtual event by visiting the front-end of your site:
Here, you can directly show the entire virtual event listing in your dashboard. You can see various options. Like; Edit, Duplicate, Delete.
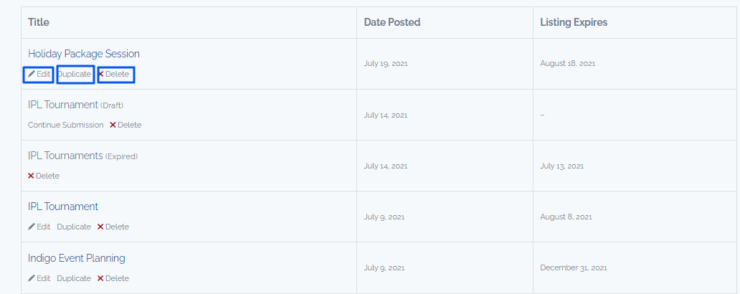
It’s a simple view of a virtual event dashboard with all the possible options.
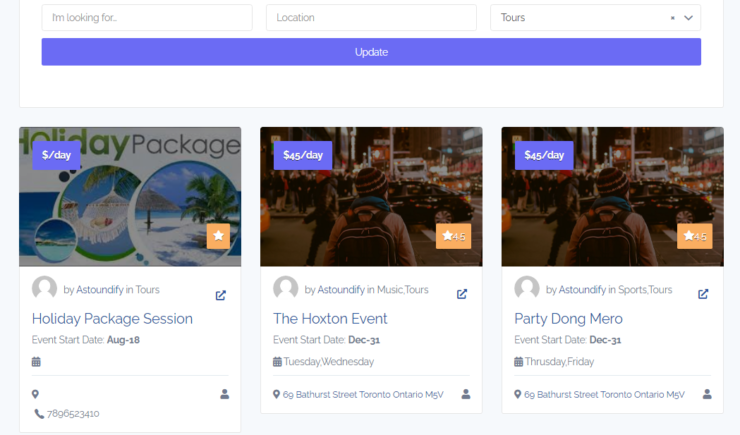
Here, you can search a virtual event keyword-wise, location-wise, and category-wise.
Step 1: On the back-end side, you can see a Speaker’s
menu. Click on it.
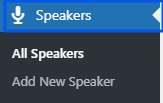
Step 2: Now, you can see the Add New Speaker button at the top of the page. Click on that button.
![]()
Step 3: Write a speaker name, add a description about the
speaker, add a speaker’s social account details, and add a speaker image. After
that, publish the page.
Whenever users can add
a new virtual event, see all the speakers in a drop-down list and choose from there.
Step 1: On the back-end side, you can see a Products menu.
Click on it.
Step 2: Now, you can see the Add New, Import, and Export button at the top of the page. Click on the
button as per your requirements.
Step 3: Write a ticket name, add a description about the
ticket, add a ticket’s price detail, add a ticket gallery image and add a
ticket image. After that, publish the page.
If you want to enhance
the sell tickets functionality on your virtual event website, you need to
install WooCommerce Bookings and our Products plugin.
Here are some of the best things to keep in mind when hosting virtual events.
When you host a virtual meeting, it generates a meeting link for participants, and via this link, people can join the Meeting. The event host can send the webinar link or the virtual conference link via email to interested people. People can register their interest by filling the event interest form on the event page.
While you’re hosting a virtual event with speakers, be sure they’ve had the necessary skills to speak in the area you’ve to choose. First, do essential research on speakers and see how they do in a public speaking event. It is one of the most reliable ways to boost your virtual events and get a great audience.
There are many ways to monetize your virtual event. You can offer some great monetized features—for example, sponsorship, selling premium tickets, premium membership, etc.
Make your virtual event mobile-friendly because many of your participants will attend the event on their mobile devices. When using slides, keep every slide’s content to a required minimum and adjust the font size visible on a pocket-sized screen.
Physical events are friendly. But, in this pandemic, virtual events are countless ways to connect with people worldwide. You can use various platforms to host virtual events. As you can see, building a virtual event website in WordPress is super easy with few simple steps. If you follow the process of this guide, you create the best virtual event website in WordPress that will grow your website now and in the future.
Please get in touch with us if you have any queries. You can always share your ideas in the comments section below.
Let’s dive deep into the world of Elementor popups and unveil the secrets to harnessing their full potential! In this article, we…
Read articleAre you tired of manually posting job listings on your website and sifting through countless resumes? Look no further than the WP…
Read articleElementor is a powerful page builder plugin for WordPress that makes it easy to create custom popups for your website. In this…
Read article Optimized by Seraphinite Accelerator